

Applying furniture decor paper on a rough surface can be a challenging yet rewarding task. As a supplier of Furniture Decor Paper, I've seen firsthand the transformative power of this material. In this blog post, I'll share some tips and techniques on how to achieve a smooth and professional finish when applying decor paper to a rough surface.
Understanding the Surface
Before you start applying the decor paper, it's essential to understand the nature of the rough surface. Different surfaces require different preparation methods. For example, a surface with deep grooves or uneven texture may need more extensive smoothing compared to a surface with minor roughness.
Inspect the surface carefully for any cracks, holes, or loose particles. Fill in any cracks or holes with a suitable filler and sand the surface to remove any loose debris. The goal is to create a relatively smooth and even base for the decor paper to adhere to.
Choosing the Right Decor Paper
Not all decor papers are created equal, especially when it comes to rough surfaces. Look for papers that are designed to conform to uneven surfaces. Decorative Paper for Melamine Board and Printed Decorative Paper are excellent options as they are often more flexible and can better adapt to rough textures.
Consider the thickness of the paper as well. Thicker papers may be more durable but can also be more challenging to apply on a rough surface. Thinner papers, on the other hand, may conform more easily but may require more careful handling.
Preparing the Surface
Once you've chosen the right decor paper, it's time to prepare the surface for application. Start by cleaning the surface thoroughly to remove any dust, grease, or dirt. You can use a mild detergent and water solution, followed by a clean, dry cloth to wipe the surface.
Next, sand the surface lightly with fine-grit sandpaper. This will help to create a slightly rough texture that will improve the adhesion of the decor paper. Be careful not to sand too aggressively, as this can damage the surface.
After sanding, vacuum the surface to remove any dust particles. You can also use a tack cloth to ensure that the surface is completely clean.
Applying the Adhesive
The type of adhesive you choose will depend on the type of decor paper and the surface you're working with. For most rough surfaces, a contact adhesive or a pressure-sensitive adhesive is recommended.
Apply the adhesive to both the surface and the back of the decor paper according to the manufacturer's instructions. Make sure to apply the adhesive evenly and avoid any drips or puddles.
Allow the adhesive to dry for the recommended amount of time. This will usually be a few minutes, but it can vary depending on the type of adhesive and the environmental conditions.
Applying the Decor Paper
Once the adhesive is dry, it's time to apply the decor paper to the surface. Start by aligning one edge of the paper with the edge of the surface. Slowly lower the paper onto the surface, using a squeegee or a roller to smooth out any air bubbles as you go.
Work your way across the surface, smoothing the paper down firmly to ensure good adhesion. Pay special attention to the edges and corners, as these areas are more prone to lifting.
If you encounter any air bubbles, use a pin to prick them and then smooth them out with the squeegee or roller.
Trimming the Excess Paper
Once the decor paper is applied, use a sharp utility knife to trim the excess paper along the edges of the surface. Make sure to cut as close to the surface as possible to create a clean, professional finish.
Finishing Touches
After trimming the excess paper, inspect the surface for any areas that may need additional attention. You can use a touch-up pen or a small amount of adhesive to fix any minor imperfections.
Finally, allow the decor paper to dry completely before using the furniture. This will usually take a few hours, but it can vary depending on the type of adhesive and the environmental conditions.
Tips and Tricks
- Work in a well-ventilated area to avoid inhaling fumes from the adhesive.
- Wear gloves to protect your hands from the adhesive.
- Use a straight edge or a template to ensure that the edges of the decor paper are straight.
- If you're applying the decor paper to a large surface, it may be helpful to have someone assist you.
- Take your time and be patient. Applying decor paper to a rough surface can be a time-consuming process, but the results are well worth it.
Conclusion
Applying furniture decor paper on a rough surface may seem like a daunting task, but with the right tools, materials, and techniques, it can be a relatively straightforward process. By following the steps outlined in this blog post, you can achieve a smooth and professional finish that will transform the look of your furniture.
If you have any questions or need further assistance, please don't hesitate to contact us. We're here to help you find the perfect Furniture Decor Paper for your project and provide you with the support you need to ensure a successful application.
Whether you're a DIY enthusiast or a professional furniture maker, our high-quality decor papers are designed to meet your needs. We offer a wide range of colors, patterns, and textures to choose from, so you can find the perfect paper to match your style and design preferences.
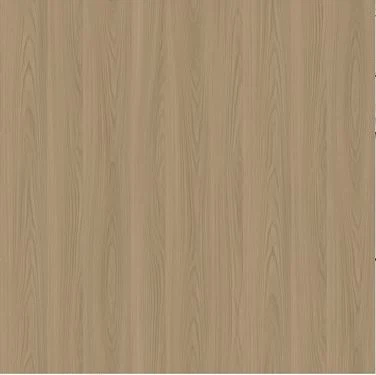

So, why wait? Contact us today to learn more about our products and how we can help you transform your furniture with our Furniture Decor Paper.
References
- Furniture Manufacturing Handbook, various authors
- Decorative Paper Application Guide, industry publication