Hey there! I'm a supplier of Furniture Decor Paper, and I'm stoked to share with you how to install furniture decor paper on a textured surface. It might seem a bit tricky at first, but with the right steps and a bit of patience, you can transform your old furniture into something brand - spankin' new.
Why Choose Furniture Decor Paper?
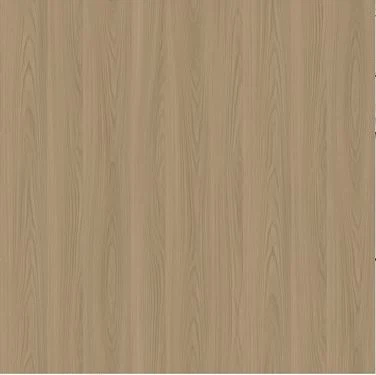
Before we jump into the installation process, let me tell you why furniture decor paper is a great choice. It's super versatile, affordable, and comes in a ton of different designs. Whether you're going for a rustic wood look with Melamine Decor Paper, a sleek modern pattern with Printed Decorative Paper, or something else entirely, there's a decor paper out there for you. Plus, it's a lot easier to work with than some other materials, and it can give your furniture a fresh new look without breaking the bank.
Preparing the Textured Surface
The first step in installing furniture decor paper on a textured surface is to prep the surface. This is crucial because a clean and smooth surface will ensure that the paper adheres properly.
- Clean the Surface: Start by giving the textured surface a good cleaning. Use a mild detergent and a soft cloth to wipe away any dirt, dust, or grease. You want to make sure there's nothing on the surface that could prevent the paper from sticking.
- Sand the Surface (Optional): Depending on how rough the texture is, you might want to sand the surface a bit. This will help to smooth out any bumps and ridges, making it easier for the paper to lay flat. Just use a fine - grit sandpaper and sand gently in the direction of the texture. After sanding, wipe away any dust with a clean cloth.
- Repair Any Damage: If there are any cracks, holes, or other damage on the surface, now's the time to fix them. You can use wood filler or putty for wooden surfaces, or a suitable filler for other materials. Let the filler dry completely and then sand it smooth.
Measuring and Cutting the Decor Paper
Once the surface is prepped, it's time to measure and cut the decor paper.

- Measure the Surface: Use a measuring tape to measure the length and width of the textured surface. Add a few extra inches to each measurement to allow for any mistakes or adjustments.
- Cut the Paper: Lay the decor paper on a flat surface, pattern side down. Use a sharp utility knife and a straight edge to cut the paper to the appropriate size. Make sure your cuts are straight and clean. You can also use scissors for smaller pieces or more intricate cuts, but a utility knife will usually give you a cleaner edge.
Applying the Adhesive
There are a few different ways to apply adhesive for furniture decor paper.
- Use Spray Adhesive: Spray adhesive is a popular choice because it's easy to apply and dries quickly. Hold the spray can about 6 - 8 inches away from the textured surface and spray the adhesive evenly. Make sure to cover the entire surface, but don't over - spray, as this can cause the paper to bubble.
- Use Glue: You can also use a liquid glue, such as PVA glue. Apply the glue to the surface using a brush or a roller. Spread the glue evenly, making sure to get into all the nooks and crannies of the texture. Let the glue dry slightly until it's tacky to the touch.
Installing the Decor Paper
Now comes the fun part - installing the decor paper on the textured surface.
- Position the Paper: Carefully place the cut decor paper on the textured surface, pattern side up. Start at one end and slowly lower the paper onto the surface, making sure it's lined up correctly. Smooth out any wrinkles or air bubbles as you go. You can use a plastic squeegee or a credit card to smooth the paper from the center out towards the edges.
- Press the Paper Down: Once the paper is in place, use a firm, even pressure to press it down onto the surface. This will help the paper adhere to the texture and the adhesive. You can use a roller or a smooth - surfaced object to apply pressure. Make sure to press down on all areas of the paper, especially around the edges and in the textured areas.
- Trim the Excess Paper: After the paper is firmly in place, use a utility knife to trim away any excess paper around the edges. Make sure to cut as close to the surface as possible for a clean finish.
Finishing Touches
After the decor paper is installed, there are a few finishing touches you can do.
- Seal the Edges: To prevent the edges of the paper from peeling up, you can seal them with a clear sealant or a bit of glue. Apply the sealant or glue along the edges using a small brush and let it dry.
- Buff the Surface: Use a soft cloth to gently buff the surface of the decor paper. This will help to smooth out any remaining wrinkles and give the paper a nice, finished look.
Troubleshooting
Even if you follow all the steps correctly, you might run into a few issues.
- Bubbles: If you notice bubbles under the paper, don't panic. You can use a pin to prick the bubble and then smooth it out with a squeegee or credit card.
- Peeling Edges: If the edges of the paper start to peel up, you can re - apply adhesive to the edges and press them back down. Make sure to hold the edges in place for a few minutes to allow the adhesive to bond.
Conclusion
Installing furniture decor paper on a textured surface is a great way to give your old furniture a new lease on life. With the right preparation, a bit of patience, and the right techniques, you can achieve a professional - looking finish. As a Furniture Decor Paper supplier, I've seen firsthand how much of a difference decor paper can make. Whether you're using Melamine Decor Paper, Decorative Paper for Melamine Board, or Printed Decorative Paper, we have a wide range of options to suit your needs.
If you're interested in purchasing furniture decor paper for your next project, don't hesitate to reach out. We're here to help you find the perfect paper and answer any questions you might have. Let's turn your furniture into something amazing together!
References
- "Furniture Refinishing 101" - A DIY guidebook on furniture restoration
- Online forums and communities dedicated to furniture upcycling and DIY projects